
How to Remove Large Bathroom Mirror Glued to the Wall
When it comes to removing a large bathroom mirror, safety and precision are paramount. You’ll need to start by gathering essential tools like a heat gun, pry bar, and wire saw, but that’s just the beginning. Don’t forget to don protective gear and tape the mirror to minimize shattering risks. What’s the best way to soften the adhesive and create a gap without damaging your wall? And how can you ensure the mirror comes off smoothly with minimal damage? There are crucial steps you won’t want to miss to make this process as efficient and safe as possible.
How to Remove Large Bathroom Mirror Glued to the Wall?Key Takeaways
- Wear safety glasses and leather gloves to protect from glass shards and cuts.
- Tape the mirror surface with duct tape to minimize shattering risk.
- Use a heat gun or blow-dryer to soften the adhesive by applying heat along the mirror edges.
- Insert a putty knife or pry bar into the corners to create a gap, then switch to a wire saw for controlled cutting.
- Have a partner support the mirror’s weight as you gradually pull it off the wall to prevent breakage.
Safety Considerations Before Removing a Bathroom Mirror
Before you start removing a large bathroom mirror, prioritize safety by donning protective clothing and eyewear. They shield yourself from potential glass shards and tool mishaps.
Safety considerations are paramount when handling a large bathroom mirror due to its weight and fragility. Begin by applying protective measures such as taping the mirror surface to reduce the risk of shattering. Lay down surface protection to safeguard your flooring.
Always work with a partner to help control the mirror’s movement and minimize the risk of accidents. Taking these steps ensures a safer and more efficient mirror removal process.
Gather Your Tools and Materials
Before you begin removing the mirror, gather essential tools.
- Heat gun / blow-dryer: Use a heat gun or blow-dryer to evenly apply heat along the edges of the mirror. Ensure that the adhesive softens for a safer and more manageable removal.
- Putty Knife / Pry Bar: Gather your putty knife and pry bar to loosen the mirror from the wall.
- Wire Saw: Gather your wire saw to cut through the adhesive behind the large bathroom mirror.
- Safety Glasses: Ensure you wear safety glasses with impact-resistant lenses. It can shield your eyes from any potential glass shards or debris during the mirror removal process.
- Leather Work Gloves: Don a pair of durable leather work gloves to protect your hands from cuts and injuries. It also provides a secure grip on the mirror and tools.
- Canvas Drop Cloth: Lay down a canvas drop cloth to protect your floors and create a safe workspace.
- Duct Tape: Make sure you have duct tape to protect the mirror surface and prevent it from shattering during removal.
Instructions for Removing a Large Bathroom Mirror Glued to the Wall
Now follow these steps to remove a mirror.
Step 1: Protect the area with a thick canvas drop cloth.
Before you begin the mirror removal process, lay down a thick canvas drop cloth. It protects the floor from potential debris and glass shards. This essential step ensures you protect the area and minimize damage while you remove a bathroom mirror.
Position the drop cloth directly under the mirror, making sure it extends several feet beyond its edges. This precaution catches any falling pieces, reducing the risk of injury and making cleanup easier. The thick canvas material is durable enough to absorb impact and prevent scratches or dents on the floor.
Step 2: Use duct tape to cover the mirror.
Cover the mirror with duct tape in a grid pattern to catch glass shards if it breaks during removal.
Start by applying horizontal strips of duct tape across the mirror, spacing them about six inches apart. Follow with vertical strips, creating a secure, cross-hatched grid. This method protects you from possible injuries and helps contain glass shards if the mirror cracks. Ensure the tape adheres firmly to the surface to maximize safety.
Step 3: Soften the glue with the heat gun or blow-dryer.
Carefully heat the edges of the mirror with a heat gun or blow-dryer to start loosening the adhesive. Hold the heat gun or blow-dryer about six inches away from the mirror’s surface to avoid overheating. Move the heat source in a slow, steady motion along the edges.
This process will soften the glue, making it easier to detach the mirror from the wall. Be patient and ensure you evenly distribute the heat to avoid damaging the mirror or the wall.
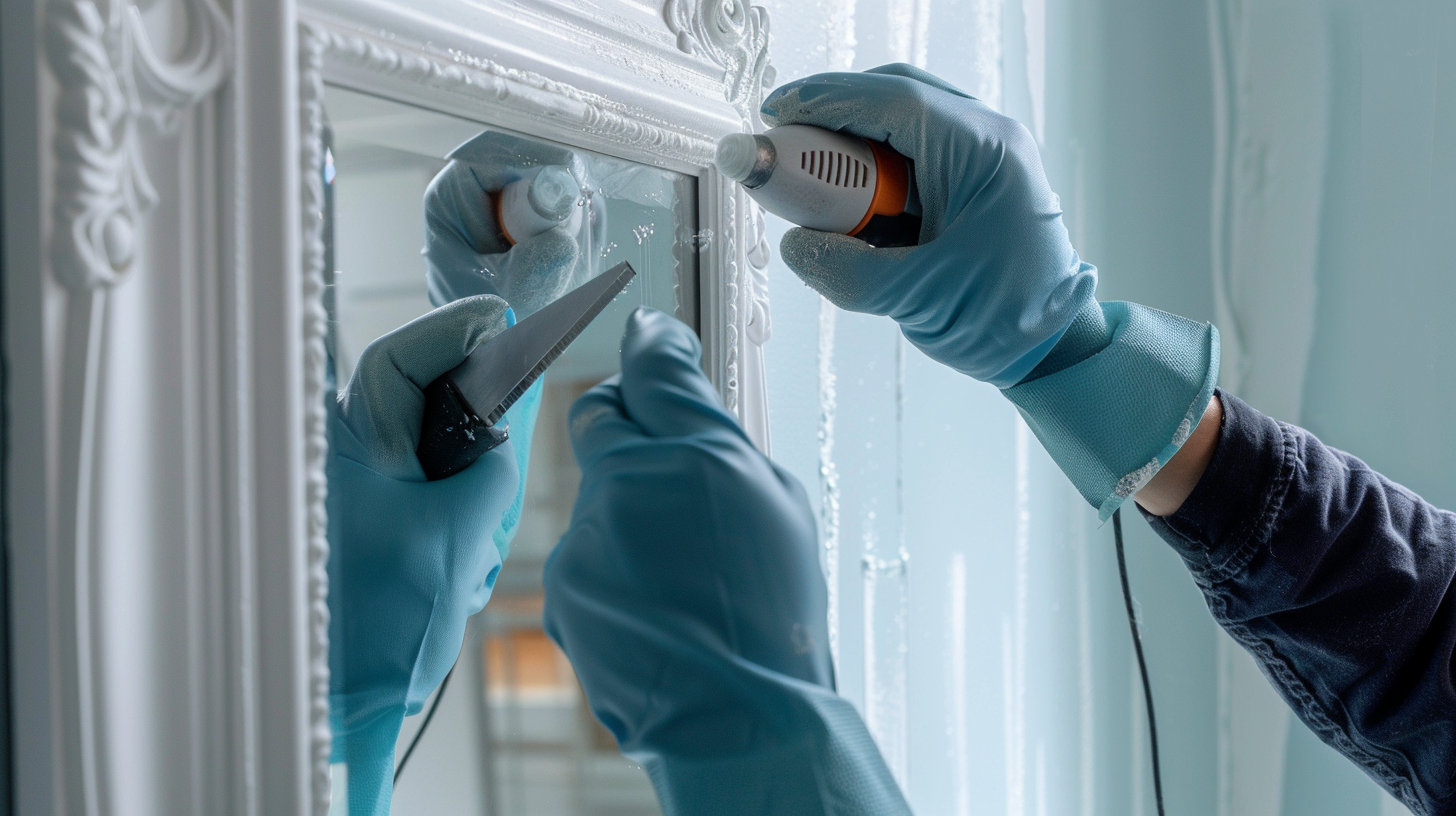
Step 4: Pry the edges of the mirror from the wall with a putty knife or pry bar.
Once the adhesive is softened, use a putty knife or pry bar to gently pry the edges of the mirror from the wall. You should start at the corners and work toward the center. Carefully insert the putty knife or pry bar under the mirror edges. Then apply gentle pressure to avoid damaging the wall or mirror.
Work methodically, lifting small sections at a time. Always keep a helper nearby to support the mirror and prevent it from falling. It’s crucial to move slowly and steadily, ensuring that the mirror separates evenly from the wall. Remember to wear protective gear throughout the process.
Step 5: Slide the wire to saw through all the adhesive.
Begin by inserting the wire saw at a top corner of the mirror. Ensure it’s securely positioned to start cutting through the adhesive. Work diagonally across the mirror, steadily sawing through the adhesive with controlled, even motions.
If you encounter resistance, apply heat to soften the adhesive, making it easier to cut. Continue sawing, using gentle prying if necessary to keep the wire saw moving smoothly.
Gradually work your way down, ensuring the wire saw remains in constant contact with the adhesive. Maintain a steady pace until you reach the bottom of the mirror.
Step 6: Pull the mirror off the wall.
After fully cutting through the adhesive, slowly and cautiously start pulling the mirror off the wall with your helper’s assistance. Gently pull from the top, ensuring even pressure to minimize stress on the glass. Your partner should support the mirror’s weight to prevent sudden movements that could break the glass.
Continue to pull the mirror off the wall gradually, keeping a steady hand to avoid any jerky motions. If you encounter resistance, pause and recheck for any remaining adhesive spots. Once the mirror is free, carefully set it down in a secure area.
Step 7: Repair and paint the wall after removing the mirror.
Carefully inspect the wall for any damage or leftover adhesive that needs repair. Begin by scraping off any remaining adhesive using a putty knife.
Next, repair any holes or imperfections by patching them with wall compound. Allow the compound to dry as per the manufacturer’s instructions. Once dry, sand the patched areas to create a smooth, even surface. Use a fine-grit sandpaper to ensure the wall is ready for painting.
Clean off any dust with a damp cloth. Apply a primer to the sanded areas to ensure proper paint adhesion. Once the primer dries, paint the wall to match the rest of the bathroom.
Conclusion
Safety should always be the top priority when removing a large bathroom mirror. Wear protective clothing and eyewear, and enlist a partner to help manage the mirror’s weight.
Use the correct tools, such as a heat gun and putty knife, to carefully detach the mirror from the wall. Inspect and repair any wall damage once the mirror is removed.
Following these steps ensures a smooth and safe removal process, leaving your bathroom ready for the next upgrade.
Learn more bathroom maintenance tips at CottonCat Blog! Find your next favorite shower curtain at CottonCat!